Sidebar Ads

This is default featured slide 1 title

Go to Blogger edit html and find these sentences.Now replace these sentences with your own descriptions.

This is default featured slide 2 title

Go to Blogger edit html and find these sentences.Now replace these sentences with your own descriptions.

This is default featured slide 3 title

Go to Blogger edit html and find these sentences.Now replace these sentences with your own descriptions.

This is default featured slide 4 title

Go to Blogger edit html and find these sentences.Now replace these sentences with your own descriptions.

This is default featured slide 5 title

Go to Blogger edit html and find these sentences.Now replace these sentences with your own descriptions.

Friday, October 2, 2009

Zombiefied People

Ever wanted to transform people into zombies? Well you can now using photoshop. In just a few steps, this tutorial will teach you how to make zombiefied people.

Difficulty: Veteran

Introduction
As you can see below, we will transform the beautifull Pussycat Dollz-Nicole Scherzinger into a terrifying zombie.
Note that this tutorial contains material that may be graphic to younger users. Then again, we're making this, so we all know it's as fake as it can get. That's the beauty of Photoshop.
I am gonna aim to make it as gorey as my favorite kind of zombies. The ones from CapCom's Dead Rising and the new Dawn of the Dead.
That means lots of blood, limbs and even some torn off skin. You will really regret seeing her again when the zombie-apocalypse is in order. Let's hope that never happens... Or do we? Haha!


Zombiefied People
Pale Skin
Zombies are dead. And they have been for a while. When a person dies, the blood stops flowing through their body not giving the skin that characteristic redish look. Everyone will look much paler then they normally should.
And since Nicole is from Hawaii, her skin is a bit tanned. But you can use this technique with ANY skintype. Just make sure that you don't overdo it. For example with people with a very dark skintone. If you overdo it, they tend to look more like albino's and we don't want that.
For this tutorial I've chosen a very nice pose on which we can add loads of things that will be cool!

Zombiefied People
Create a new layer on top of the photo and set the blending-mode to COLOR and select a brush and start brushing with black over the skin.
Lower the opacity slightly and notice that your person gets that death-look written all over him/her.

Zombiefied People
Now grab your black brush again, but this time a VERY small size. 1px or 2px is enough. Then zoom in a lot if that makes you paint a little better.
With the blending-mode of a new layer set to OVERLAY, lower the opacity slightly and start brushing small cuts and bruises around the face and arms.
Imagine this zombie having to fight it's way through flocks of zombies and having his/her head bashed in a few times by objects.

Zombiefied People
Adding the Bones
Now with the image supplied by sxc.hu, use these bones and paste them into your document and press CTRL+T to transform it down to a size suitable for the person we're turning into a zombie.

Zombiefied People

Zombiefied People
Press CTRL+L to play with the sliders of the levels of the image to make the bones look more real and matching to the image you're using. This is different for every image, just make sure that the amount of shading and lighting in the image are almost the same as the image you're using.
Then press CTRL+T again to make it a little smaller and rotate it. Then place it near the arm.

Zombiefied People
Press CTRL+U and drag the middle slider (the saturation) some to the left to make it look a little greyer. Also drag the lower slider a little too the left a little to make it darker if needed.
Then grab your Pen-Tool or Lasso-Tool or Polygonal Lasso-Tool and cut away all the white in the bones-image and the other bone as well. Also cut a little off the bone to make it look like only a part of the bone is coming out his/her arm.
Then open up a new layer above the bones layer and press CTRL+G or CTRL+SHIFT+G to mask it with the layer below and use your black brush at around 4px to brush a little at the bottom where the brush and the skin are connecting. Lower the opacity to make it a little transparent.

Zombiefied People
Grab the Burn-Tool and press D to reset your colors to black and white. Then look at the taskbar and set the range to Shadows and the exposure to 20%. Then start brushing around the bone-area on the original photo-layer. This will make it look like the skin is all rotten and the bone is coming right through.

Zombiefied People
Continue with the Burn-Tool on the face and notice that if you brush over the same area twice or more then once, the color will get "burned" like the tool's name. Be very carefull with this/ You don't want to make it too red. That's why your trusty friend "CTRL+Z" is always there to save the day!
Pay special attention to the area around the eyes and mouth to give the eyes that death-look and the mouth.. well let's just say I got a surprise for that later!

Zombiefied People
Blood Everywhere
From the great, yet sick, site AngryBlue.com, download the AngryBlue-brushes pack v1 and use the largest brush of them all to brush around your document on a new layer.
Set the color to standard red and just play around with the placing. Remember that you can always remove pieces of the blood if unwanted, so don't worry and place it away!

Zombiefied People
Set the blending-mode of the blood to MULTIPLY and press CTRL+U to darked it a little by dragging the bottom slider a little to the left. Your blood should look very real. Blood may be very red, but we're talking about zombies who have been out for days with blood on their bodies and clothes which has gone old. And the older blood gets, the darker it gets!

Zombiefied People
Grab your Eraser and just erase anything blood-related outside the person itself. Don't worry about the unwanted blood inside the person. We'll fix that later!

Now with the Eraser again, brush away all the blood you think is too much. If you're using the same image as mine, make sure the right part of her belly is empty, because we're gonna do some cool stuff to that later!

Zombiefied People
Press D again and select the Burn-Tool once more and after selecting the original layer again, brush a little darkness over the places where you placed the blood to make some blood-stains look even darker and dirtier. Gross!

Zombiefied People
Now on a new layer, grab your brush and set it to 1px or 2px and use a red color to brush small strokes around the mouth making it look like blood is dripping out of the mouth. You can set the blending-mode again to MULTIPLY or OVERLAY depending on the darkness of red you used.
I used the standard red and set the layer to MULITPLY just like the other blood-layer to make it look the same.

Zombiefied People
On a new layer, grab a white brush of 2px-5px and brush a little over the eyes to make them look all white and undead. Which is weird, considdering the zombies are dead. Nevermind that. Just make the pupils be gone with this effect!

Zombiefied People
With the image again supplied from the awesome sxc.hu, place the skull-image found below into your document and adjust the size a little so you can see all of it. We're gonna crop it down even more, but just make sure it's small enough to be completely seen, but not smaller then the head of your photo!

Zombiefied People

Zombiefied People
Now press CTRL+T to make the skull the same size as the head of your photo and rotate it if needed to make sure it fits over the head of your photo perfectly!

Zombiefied People
Grab your Eraser again and brush away all the parts you do not need. I chose for a part of the jaw I wish to keep. Then just remove all that!
Then press CTRL+U to drag the middle slider again a little to the left to make it look greyer. Make it look like the bone coming out of his/her arm.

Zombiefied People
Create a layer above the skull and press CTRL+G or CTRL+SHIFT+G to mask it with the layer below and use a soft black brush to brush a little shadow at the top. Again, lower the opacity if it's too much.

Zombiefied People
And just as with the face, grab a 1px or 2px red brush and paint a little drips on a new layer. Again, set it to MULTIPLY.

Zombiefied People
The Big Wound
Now because my image has a plain white background, this step is a lot easier for me. If you are using an image with a background that is filled with objects, you will need to follow my Invisible People-tutorial to learn how to remove unwanted skin or body from a filled background.
For those of you who have the same image or an image with a white background, make a new layer and use a white brush to paint a cut over the belly.

Zombiefied People
And with the same settings as last time you used the Burn-Tool, grab it again and on the original layer, brush around the hole and make it look like an actual bite or rip is out of the body. Pay close attention to the angle you're looking at and the facts that area's which are deeper then others, are also darker.

Zombiefied People
And again, use the same settings used for adding blood to the body to paint some more blood dripping from the gaping hole of her belly.

Zombiefied People
And with the exact same settings, on a layer below the white cut, add some more blood using the AngryBlue-brushes to make it look nice and dirty.
Remember, it's a zombie. Not your partner (or maybe that's what you *are* working on), but you don't have to be gentil. Make it as dirty and gross as possible!

Zombiefied People
Final Touches
Hey, let's also add a gunshotwound, because who here hasn't shot a zombie? Well probably no-one, but imagine if zombies *were* infesting the earth. Then you'd shoot one yeah!
With the exact same settings as before, use the Burn-Tool to brush a little more bruises and a little hole in his/her arm.

Zombiefied People
And then with the same settings for the blood again, make some blood drip out of the hole as if the wound was fresh!

Zombiefied People

Zombiefied People
Conclusion
Now let's put the two images next to each other shall we? As you can see, you did an amazing job. If you followed all steps, your zombie looks real, sick and dirty. Have fun with this technique! And try to experiment with different photo's. If you got an amazing outcome, post it in the comments and if it's good, I'll post it in the tutorial so everyone can see your creation!

Adding Texture to the Skin


Adding Texture to the Skin

Basically, in this tutorial I’m going to be showing you how to add texture to the skin like the one in the below image.

Firstly, start by finding a stock photo that you can add the texture to. For example, you can use this one or you can of course, go to Google Images and look up some picture you are interesting in. Also you need to find some appropriate stone texture. You can do it in the same way or feel free to use mine. Ok, now open up both of your photos in Photoshop, you can either keep it at it’s current size of resize it down a little bit if you want. After that bring the texture picture to the canvas with the man’s face:

Adding Texture to the Skin Image 01

Flip this texture vertical with Edit > Transform > Flip Vertical and set opacity up to 50% for this layer:

Adding Texture to the Skin Image 02

Ok, then mess with the layer mode & opacity/fill. I tried Multiply with opacity of 80%. After that apply Edit > Transform > Warp to transform the texture as on picture below:

Adding Texture to the Skin Image 03

This texture will cover the face and we need one more for the neck covering. Copy the stone texture one more time to our canvas and then change layer mode to the Multiply for the new layer, also set opacity to 80% up. After that resize it a little bit and transform is as below using Edit > Transform > Warp like on picture below:

Adding Texture to the Skin Image 04

Now it’s time to compose two different texture layers in one and cut away the textures out the skin area. Hide the upper layer (click on the eye, which indicates layer visibility) and go to lower layer with the texture. Select the Eraser Tool and a soft round brush about 20 px and process the edges to get the picture like mine:

Adding Texture to the Skin Image 05

Go back to the hidden layer and make it visible again. Now process its edges in the same way.

Adding Texture to the Skin Image 06

Merge two of these layers and change layer mode to Multiply again. Then you might want to make more sharpen this layer. Get out the Sharpen Tool and a soft round brush about 400 px and make a little sharpen work:

Adding Texture to the Skin Image 07

Now I would like to clear eyes area from the texture. To do this use the Eraser Tool and a soft round brush about 10 px:

Adding Texture to the Skin Image 08

Time to make the texture three-dimensional. For this effect use Dodge Tool (Range: Highlights, Exposure: 35%) and Burn Tool (Range: Shadows, Exposure: 40%) to make some parts of the face more brightness and bring some shadows to the dark parts. Try to do it more realistic.

Adding Texture to the Skin Image 09

Now I would like to bring man’s clothes some sharpness. Use the Sharpen Tool (Size: 90px, Mode: Normal, Strength: 50%) to get the picture similar to this:

Adding Texture to the Skin Image 10

Looks good! Isn’t it? But we are not finished yet! Now time to add some color to the skin. Use Select > Load Selection to create selection as on picture below, after that create a new layer and fill the selected area with color of #331e01:

Adding Texture to the Skin Image 11

Remove the selection with Ctrl+D and change the layer mode for this layer to Color:

Adding Texture to the Skin Image 12

After creating a new color for the man’s skin I think we should add some cold hue to his face. For this effect select the Rectangular Marquee Tool (Feather: 100 px) and make selection as on picture below:

Adding Texture to the Skin Image 13

Then use Image > Adjustments > Hue/Saturation with similar settings to these:

Adding Texture to the Skin Image 14

Remove selection with Ctrl+D. Now we have an effect like this one:

Adding Texture to the Skin Image 15

Looks great! To finish off the tutorial select the Eraser Tool and a soft round brush with size of 100 px and make clear the lower part of the face and neck, but a little bit!

Adding Texture to the Skin Image 16

That is it for now! Read this tutorial, make it and enjoy your own cool pictures! Also thanks for visiting PhotoshopStar.


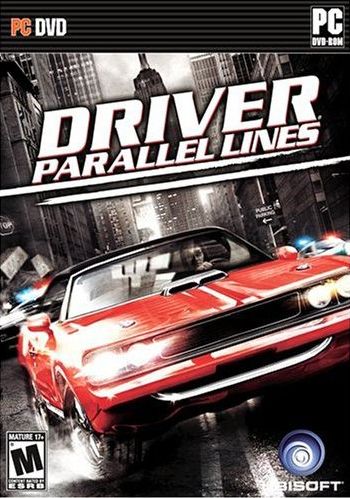
Driver Parallel Lines

Image

http://www.opgamez.net/media/screenshots/Driver.Parallel.Lines-iNF2.jpg

http://www.vidaextra.com/images/2007/01/driverwii01.jpg


http://www.meristation.com/EPORTAL_IMGS/GENERAL/juegos/PC-Accion/ea/IMG-cw46a86f0d42c7a/DRIVER_PARALELL_LINESTV2006022412334800pe.jpg


System Requirements:

* Supported OS: Windows® XP (SP 1 required)/Vista (only)
* Processor: 2.0 GHz Pentium® 4 or AMD Athlon™ (3.4 GHz recommended)
* RAM: 256 MB (512 MB recommended)
* Video Card: 64 MB DirectX® 9.0c-compliant supporting Shader Model 1.1 (128 MB Shader Model 2.0 card recommended)
* Sound Card: DirectX 9.0c-compliant
* DirectX Version: DirectX 9.0c (included on disc)
* DVD-ROM: 4x DVD-ROM or faster
* Hard Drive Space: 4.8 GB free
* Peripherals Supported: Windows-compatible keyboard and mouse, Xbox 360™ Controller for Windows

File Size:
Rip: 840 MB


Download:


Password: www.gamexdownload.com

Comments System Facebook/Blogger/Disqus

disqus

Disqus Shortname

oddthemes