In this very easy Photoshop tutorial we’ll be learning how to design a nice, sleek navigation bar that you can use on your website design. This is a beginner tutorial, so if you’re an intermediate or professional Photoshop user, I’m not sure you’ll be learning from this ![]()

1. Create a New Document
First, start by making a new document in which you can make this sleek navigation bar! (I used a regular template size of (800×1000, but you might want to use a much smaller size for this tutorial.)
2. Create the Bar
Start by creating a new layer. Now make a selection inside of your document, fill your selection with #52A1C4.

Now please apply the following Gradient Overlay in the blending options/layer styles:

3. Add a Glossy Shine
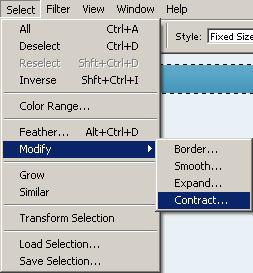
Create a new layer and select the main bar layer (CTRL + Click layer thumbnail) now contract the selection down 1 pixel by going to Select > Modify > Contract in the menu.


After contracting the selection, find and get out the Gradient Tool ( ) and set the gradient to Foreground to Transparent gradient
From the top of the selection make a gradient into the middle area like so:

Now a much smaller gradient at the bottom:

Change the layer mode for your gradient layer to Overlay, and lower the opacity if necesary.

4. Adding some Text
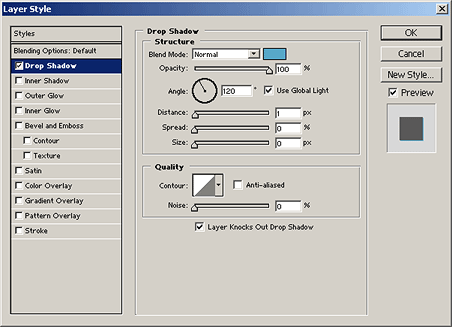
For the text I used: Tahoma, 11 pt, Bold, White with a 100% Drop Shadow as shown in the below image:

My finished product:


0 comentários:
Post a Comment